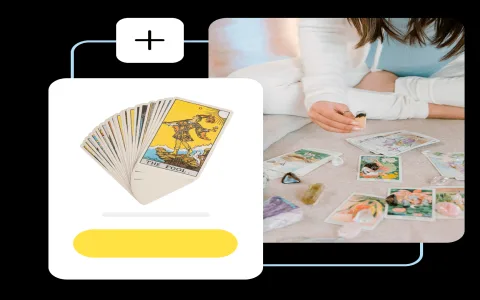
Okay so here’s the thing, I really got into designing my own tarot deck last month. Love the art, hate waiting for some big company to print it, you know? Figured I’d try printing a sample myself. Total mess at first, but hey, you learn.
The Starting Point: Pure Cluelessness
First up, I had absolutely no idea what gear I actually needed. Thought maybe my home printer would magically spit out perfect, professional-looking cards. Spoiler: it did not.
Grabbed some regular printer paper, printed my first test design. Felt flimsy as hell. Like a kid’s birthday invite. Looked cheap, bent super easy. Total fail. Knew right then I needed thicker stuff.

Step One: Finding the Right “Thick Stuff” (Cardstock)
Went online, obviously. Saw folks mentioned cardstock. But which kind? So many options! Matte, glossy, heavy, light… Brain fog.
Bought a cheap mixed pack. Big mistake. Glossy looked awful after I touched it – fingerprints everywhere. Some thin stuff was barely better than paper. Finally grabbed some heavier, smooth matte cardstock. Way better. Still not perfect, but the cards started feeling like… well, cards. Lesson learned: Don’t cheap out on the paper stage.
The Printer Woes: Home vs. Better Machines
My trusty old inkjet at home? Yeah, it blew chunks for this job. Colors looked dull and washed out on the thicker stock. And the worst part? The ink just WOULDN’T dry properly on the matte surface. Smudged like crazy even after sitting for hours. Frustration level: max.
Researched online. People mentioned better results with:
- Higher quality inkjets using pigment ink (mine was dye-based junk)
- Print shops with beefier professional machines
Decided to try a local copy place. Pricey for samples, sure, but wow. The colors popped! Crisp lines, rich blacks. Night and day difference compared to my home disaster. If you care about how it looks, seriously consider skipping the home printer unless it’s a proper photo one.
Cutting Nightmares: Scissors Just Won’t Cut It
Printed my nice, pro-looking sample sheets. Time to cut them out. Grabbed scissors like a caveman. Crooked edges. Jagged cuts. One slightly shaky hand and the card was ruined. Felt like I was destroying all my hard work.
Looked into paper trimmers (guillotine cutters). Bought a mid-sized one. First few tries? Still not great. Learning curve! You gotta line it up perfectly and push down straight. Took practice. Messed up several cards figuring out how to hold the paper steady. Eventually got the hang of it. Clean, straight edges! Massive upgrade. Still labor-intensive, though.
Heard about dies and cutting machines – sounds super pro, but also super expensive for just testing. Maybe for the full deck someday.
The Finishing Touch: Corners Matter
Cards cut out, looking sharp. But the corners were sharp too! Literally. Felt weird. Saw real tarot decks have those rounded corners. Looks polished, feels nicer in the hand.
Bought a corner rounding punch. Sounds fancy, it’s not. Just a little handheld gizmo. Again, takes some practice to get the angle and position exactly right on each corner. Botched a few, naturally. But once you get consistent, it adds that final “real deck” feel. Worth the few bucks and effort.
Where I’m At Now
So, after wasting some cash on bad paper and fighting my home gear, here’s the setup I finally landed on for making decent sample cards:
- Cardstock: Heavyweight Matte (~300gsm feels good)
- Printing: Outsourced to a print shop (saves hair-pulling)
- Cutting: A decent, sturdy guillotine paper trimmer
- Corners: That little corner rounding punch thingy
Is it factory perfect? Nah. But it lets me hold a physical, sturdy sample of my designs, see the colors properly, and feel the weight. Way better than just looking at a screen. Hope this saves someone else the early frustration! Printing cards at home is doable, but gear matters a ton.